For a successful installation, please ensure you take these steps before you begin:
Read Pre-Installation Steps for unix to ensure you will be able to install and run Zim 8.50 for Unix without problems;
Verify that you have full administrator privileges on the local machine (If you are not sure, contact your system administrator);
You also need to download the Zim 8.50 for Unix installer from the Zim website if have not done so.
The installation procedure exemplified here was based on the Debian 7 Linux distribution.
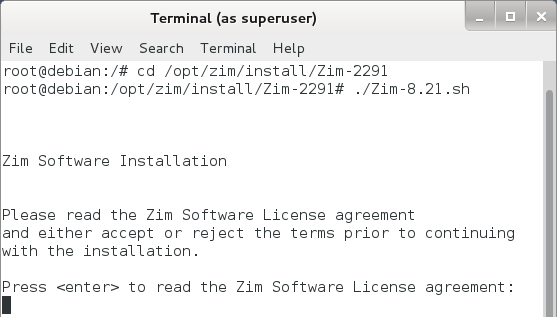
1. Go to the installation directory (for example, /opt/zim/install/Zim-xxxx)
cd /opt/zim.intall/Zim-2291
2. Run the shell script to begin the installation
./Zim-8.50.sh
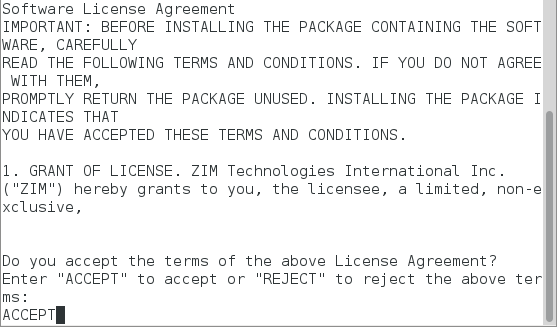
2. Read the Software License Agreement and type ACCEPT to continue
3. Choose the folder where you wish to install Zim 8.50 or Click <enter> to accept default installation location (recommended)

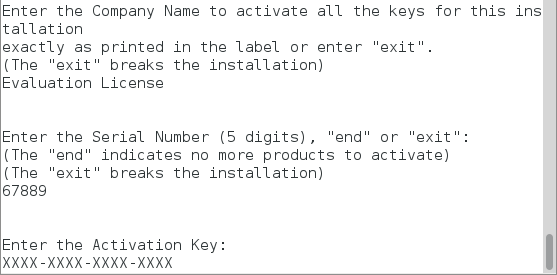
4. Enter the license information as it appears in the e-mail you received after downloading Zim 8.50 for Unix
For each licensed product, you need to enter the following information:
Licensed To: XXXXXXXXXXX
Serial No: NNNNN
Activation Key: XXXX-XXXX-XXXX-XXXX
The following example shows the license information for the trial version (Evaluation License)
5. Repeat step 4 for each activation key you received
6. After you have entered the last activation key, type end to complete the installation
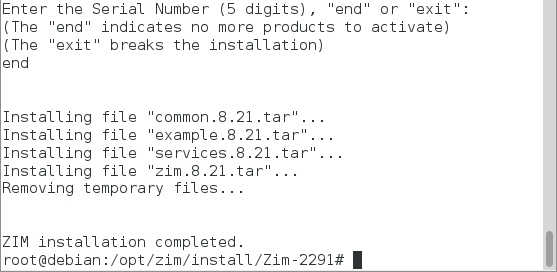
7. Verify that files were installed in the desired location (for example, /opt/zim/8.50)
cd /opt/zim/8.50
ls
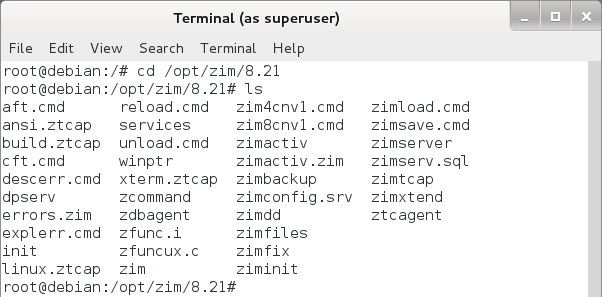
✓Zim 8.50 has been installed. However, there are some additional steps before it can be executed.
To execute the Zim 8.50 software, you first must set the UNIX environment variables. The commands used to set these variables vary depending on the shell being used.
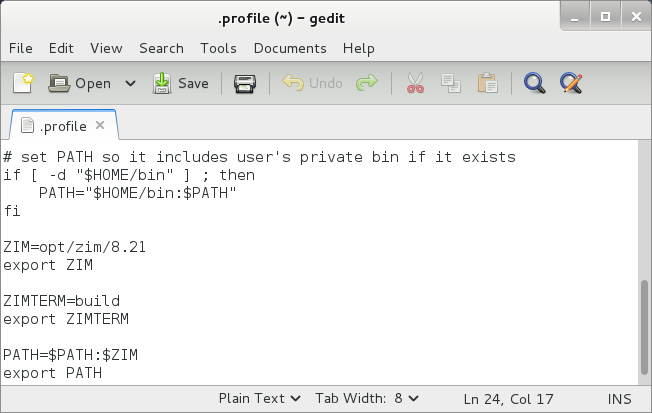
Note: To make the settings consistent on a per-user basis, append these commands to the file $HOME/.profile.
1. Set the ZIM environment variable to indicate where Zim 8.50 was installed (for example, /opt/zim/8.50)
ZIM=/opt/zim8
export ZIM
2. Set the ZIMTERM environment variable to indicate the name of your terminal
Note: The example build.ztcap is installed with the software to give a starting point for configuring this file using the name ZIMTCAP.
ZIMTERM=build
export ZIMTERM
3. Add the directory where the Zim files are located to your default search PATH
PATH=$PATH:$ZIM
export PATH
The end result should look similar to the example below:
Note: To make the settings consistent on a per-user basis, place these commands in the file $HOME/.cshrc.
setenv ZIM /opt/zim8
setenv ZIMTERM build
setenv PATH $PATH:$ZIM
1. Run the zimtcap configuration utility
$ZIM/zimtcap
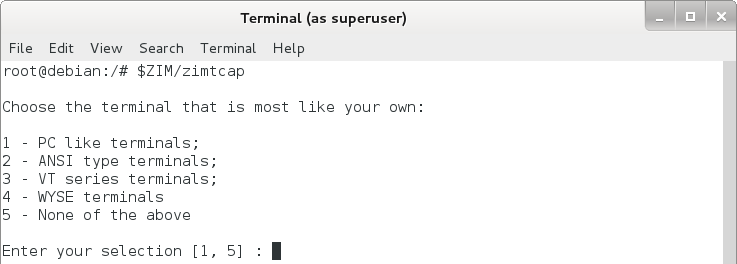
2. Follow the instructions provided on the screen
Under Zim 8.50, working directories (i.e., directories used by logged in users) are usually the same for many users.
In other words, when a user logs in, Zim Server creates a working directory with the default name 00001 (the first user), unless the options change this name (see Physical Structure of a Zim Database for more information).
When this user logs out, the next user to log in might use the same working directory name.
Zim Server needs to clear this directory for the next user, but it cannot as it contains permissions from the previous user.
As a result, the umask option has to be set appropriately by issuing:
umask 000

✓You have finished all installation procedures for Zim 8.50