Tab Control – A Tutorial
Tab Control – A Tutorial
In this example, a Tab Control is constructed for a ‘Customer Maintenance Interface’. The tab control contains three pages for Details, Addresses, and Notes.
Notes:
- The instructions assume that the developer is experienced in using the Zim Screen Painter.
- The example uses the ZOF naming conventions.
- Start the tutorial in a new initialized database.
- Measurements are made in TWIPS.
- Field names are irrelevant in this tutorial; therefore, the generated field names are sufficient.
Steps
- Create a new form.
- Paint the ‘fCustomer’ base widgets.
- Construct the tab control
- Add the widgets for each page.
- Assign the focus fields.
- Create the interface class/program.
To create a new form:
- Add a new form using DC.
- Enter the form name ‘fCustomer’.
- Click OK. The painter automatically opens.
- Assign the name ‘wCustomer’ to the window.
- Assign the caption ‘Customer’ to the window.
- Size the window to approximately 6000 x 5000 TWIPS.
To paint the ‘fCustomer’ base widgets:
- Add a status bar to the window.
- Add an OK button.
- Add a Cancel button. Assign the field tag Exit.

Sample Painted Form
To construct the tab control:
- Exit the painter and the form is created.
- From the Edit menu, select Tab Control. The Tab Control constructor interface opens.
- On the Labels tab page enter the three labels required: Details, Address, Notes
- On the Properties page, change the bottom margin from 100 to 1000.
- Select the Set Focus Field Automatically check box. This causes the zTabControl to select a field in the current tab page automatically.
- Press the Construct button. The Tab Control is constructed in ‘fCustomer’.
- A message box is displayed; ‘The form [formname] contains reserved form field numbers. These form field numbers are used by the tab control. Do you want to set form field numbers to zero’. Select ‘Yes’ to the prompt.
To add the widgets for each page:
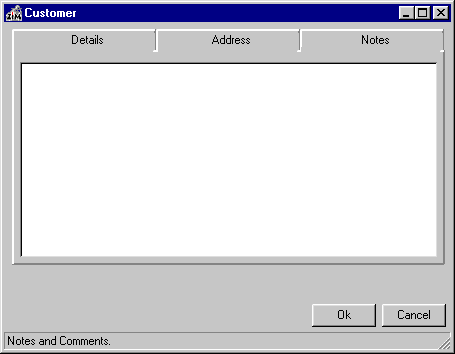
- From the ‘Edit’ menu select ‘Paint Form’. The resulting form should be similar to the following:

Constructed Tab Control
Three frames (no borders, no titles) have been added, labelled TabPage1, TabPage2, and TabPage3. These frames contain the widgets for each page. Note that the widgets must be a child frame for the tab control to display them. This can be checked in using the Z-Order window on the left side of the painter.
- For TabPage1, paint the detail fields as shown below:

The Details Page
- For TabPage2, paint the address fields as shown below:

The Address Page
- For TabPage3, paint the address fields as shown below:

The Notes Page
To assign the focus fields:
Note: Each page should have a focus field. zTabControl sets the focus field when the page changes. There is one focus field per page. The focus field number is the tab page field number plus 1.
- Assign the following focus fields:
- Name (FIELDNUM) = 101
- Company (FIELDNUM) = 201
- Notes (FIELDNUM) = 301
- Exit the painter.
To create the interface class/program:
- Create a new document with DOCNAME of ‘zCustomer’.
- Using a text editor, copy the example code from zTabControl Description into the document ‘zCustomer’.
- Search and replace the string ‘InterfaceClass’ with ‘Customer’.
- Execute zCustomer() at the command prompt.
